Upgrading your RV electrical system in stages is a great way to save on upfront costs. Starting with essentials like swapping from AGM or Lead Acid to Lithium batteries then upgrading solar charging and inverter capacity will give you immediate performance results with room to grow into bigger and more powerful systems. In this blog post, I’m going to give some tips to upgrading an RV electrical systems in stages so that the amount of re-work is minimal which will save time and money.

RV Electrical Upgrade Stages – Convert Batteries to Lithium
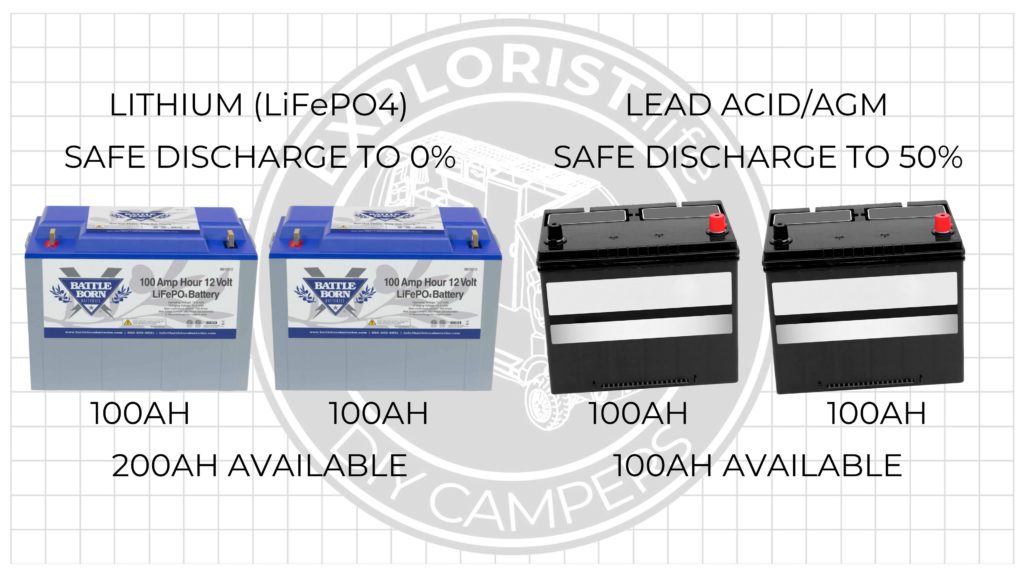
The first step in giving your RV more power is to convert the lead acid or AGM batteries it came with to Lithium Iron Phosphate batteries like Battle Born Batteries.
Even if you simply swap the 1-2 AGM or Lead Acid batteries your RV came with to 1-2 lithium batteries in the factory location, you’ll pretty much double your battery bank capacity because Lithium batteries can basically be discharged all the way to 0% without sustaining damage and a Lead Acid or AGM battery can only be discharged to 50% before lifespan starts to be negatively affected.
The only real consideration here is to make sure that your factory converter, usually installed in or behind the breaker box can be set up to charge lithium batteries. Which most newer converters can do this; but if not; a new lithium compatible converter can be had for a couple hundred bucks.
Now; if you want MORE batteries; you’ll probably need to move your battery bank to a new location with more room and add a battery bank relocation kit like we’ve shown in all of our start to finish RV electrical upgrade videos.
Advertisement:
RV Electrical Upgrade Stages – Upgrade Your Battery Monitor
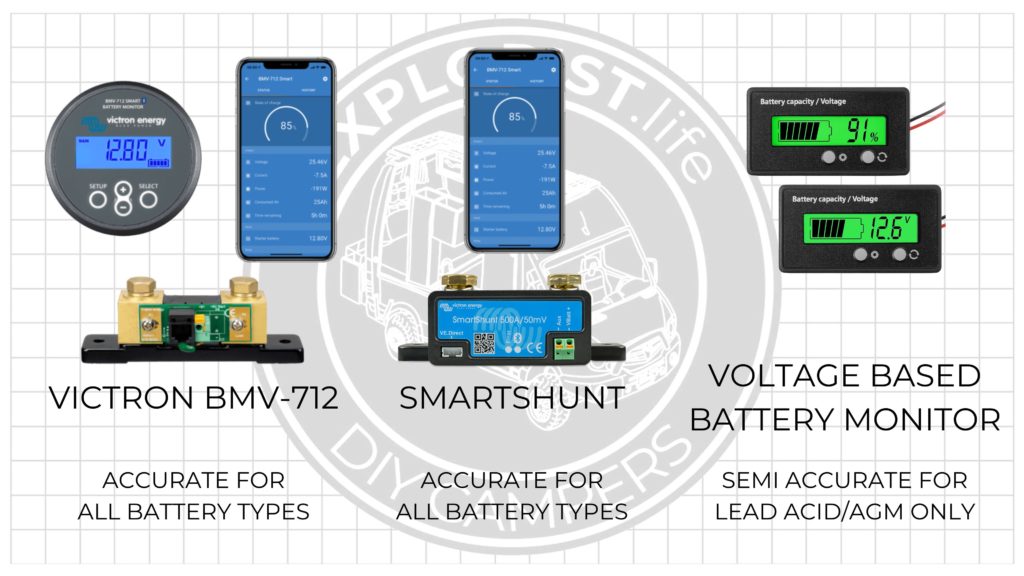
The battery monitor that comes pre-installed on most RV’s is pretty inaccurate, especially after switching to Lithium batteries; and adding a shunt based monitor like the Victron SmartShunt or Victron BMV-712 will be an immediate upgrade.
Both of these literally count how many amps go into or out of the battery and you can program the shunt with how many amp hours of capacity you have. This is a MUCH more accurate measurement than basing how full the battery is based on battery voltage alone like the factory equipment usually does:
This is also a pretty inexpensive upgrade with both the SmartShunt and BMV-712 coming in under $250 and the shunt simply gets installed between the negative battery terminal of the battery bank and all of the negative wires that were connected to the factory batteries.
Advertisement:
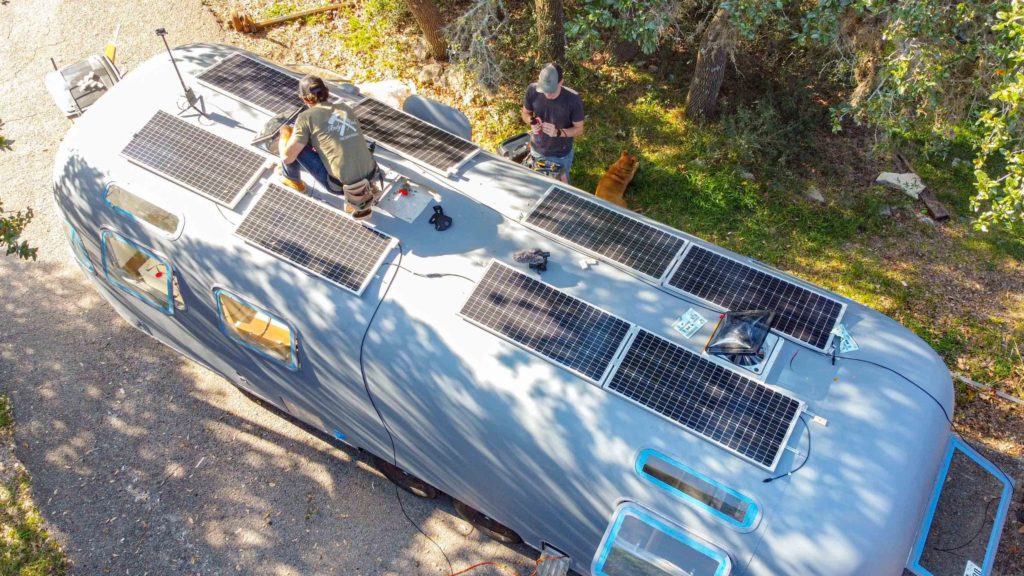
RV Electrical Upgrade Stages – Add or Upgrade Solar
Adding (or adding MORE) solar charging capabilities to your RV is the next thing I’d recommend adding to an RV electrical system with off-grid aspirations. After increasing the battery bank capacity; more solar will help recharge those higher capacity batteries.
Rule of thumb for solar array sizing is to have twice as many watts of solar as you do battery bank amp hours at 12V. For example:
- 200W of solar for 100Ah of 12V batteries
- 400W of solar for 200Ah of 12V batteries
- 600W of solar for 300Ah of 12V batteries
The only consideration here is to not add more solar than your batteries can charge at. For example: Battle Born Batteries can charge at a max rate of 50A per 100Ah battery; which means don’t add more than:
- 700W of solar to only 100Ah of batteries
- 1400W of solar to only 200Ah of batteries
- 2100W of solar to only 300Ah of batteries.
That is a pretty rare problem; but we have seen it before, so it’s worth mentioning.
Advertisement:
RV Electrical Upgrade Stages – Add an Inverter for Off-Grid 120V
Most RV’s don’t have an Inverter to turn the 12V DC power into 120V AC power for standard household outlet usage; and if they do, it’s usually only for 1-2 outlets.
Adding an aftermarket inverter charger like the Victron Multiplus between the shore power inlet and the factory breaker box like we’ve shown in our full system installs will still allow you to re-charge your batteries; but will also allow you to power ALL of your outlets from the batteries. If the inverter and battery bank is large enough; you can even start to consider using large electrical components like an air conditioner but be aware that air conditioner usage requires a VERY large, and therefore expensive battery bank with enough solar to recharge.
The main considerations here are that a big enough battery bank is necessary for various sizes of inverters. In general:
- A 2000W Inverter requires a minimum of 200Ah of battery bank capacity
- A 3000W Inverter requires a minimum of 400Ah of battery bank capacity
- A 5000W Inverter requires a minimum of 800Ah of battery bank capacity (and a 24V system)
The other considerations here is that Victron only makes an Inverter/Charger appropriate for 50A shore power in one size (as of making this video), so if you only have 200Ah of battery bank capacity; there isn’t an option for the appropriate sized 2k inverter and you’ll need to step up to 400Ah of batteries to get the Multiplus 3k 2×120:
The last consideration here is that when big inverters like these are added, upgraded wiring, fusing, and DC distribution through an added Lynx Distributor will be needed.
Advertisement:
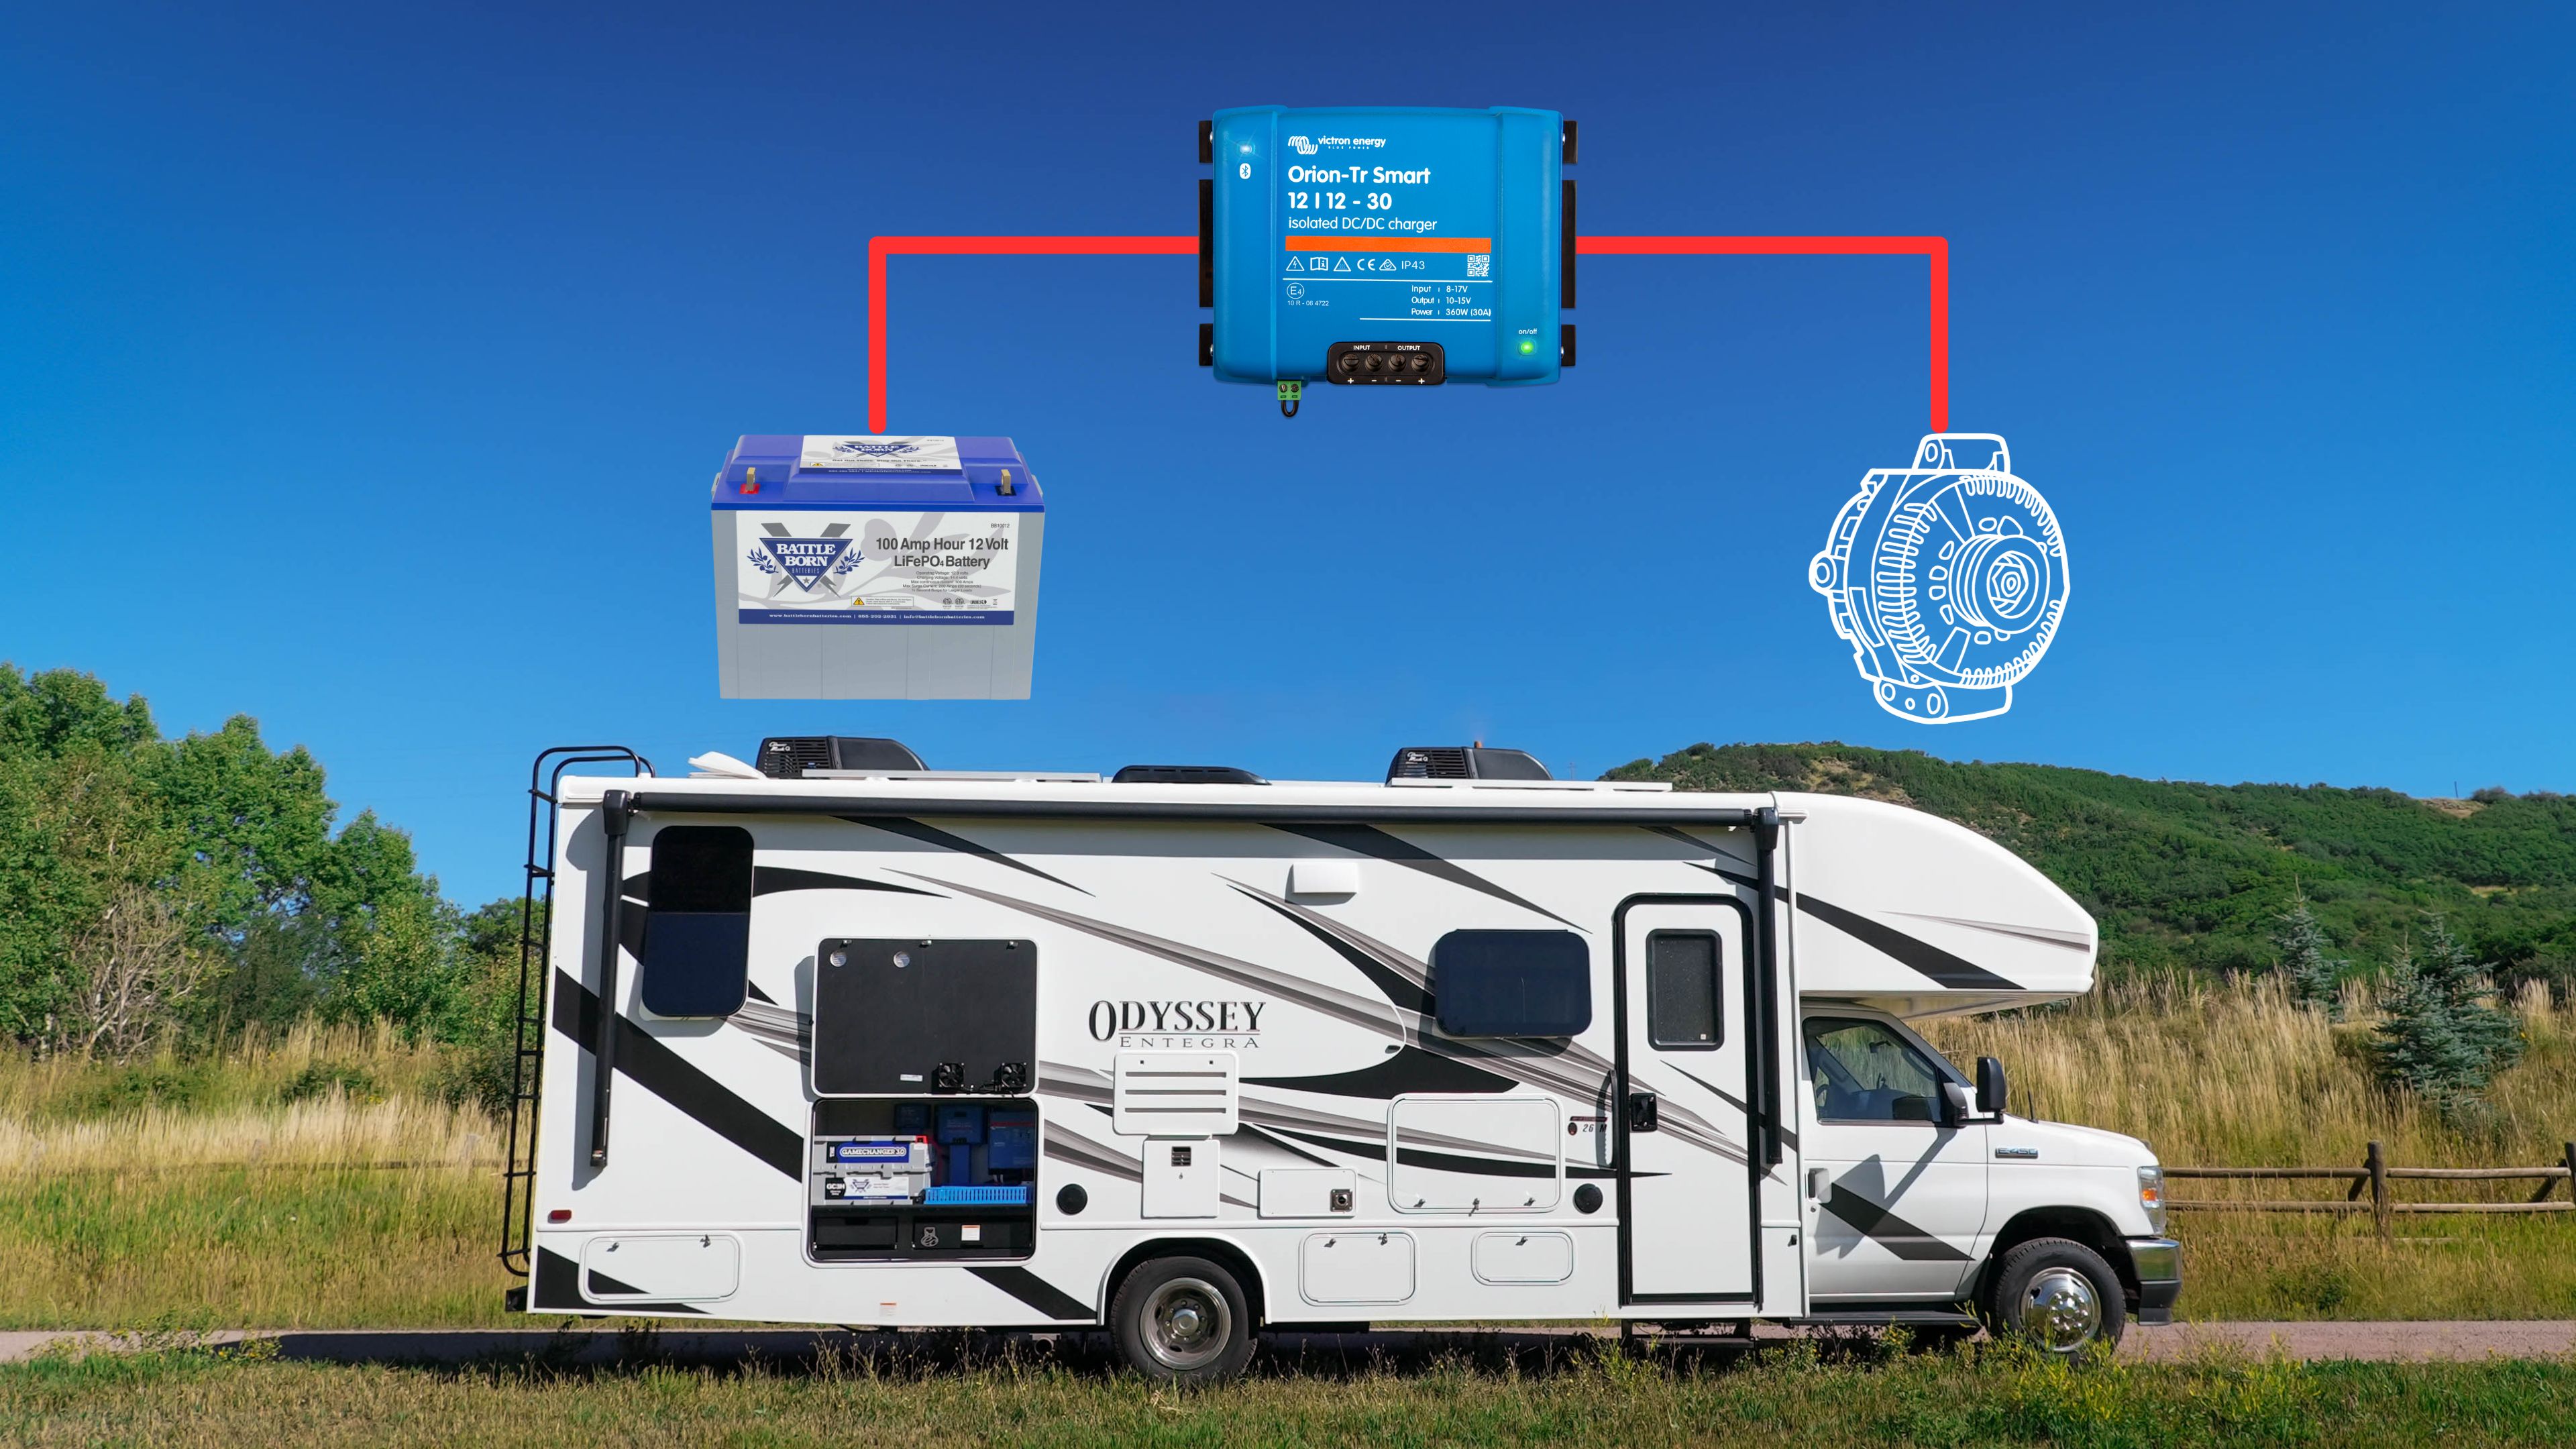
RV Electrical Upgrade Stages – Upgrade Alternator Charging
The last step in a high end RV Electrical system upgrade is to upgrade the alternator charging from the Factory 2-3A from the 7-pin connector to 30+ amps. This involves adding a DC DC Charger like the Victron Orion and then running dedicated positive and negative wires from the Lynx Distributor to the engine starting battery. If you have a towable RV like a travel trailer or 5th wheel, you’d use Anderson Connectors for the hitch connection and we have those options available in our kits at https://shop.explorist.life
Upgrading alternator charging will ensure you arrive to your campsite with a full battery; but upgraded alternator charging isn’t for everybody. Remember that your solar will continue to charge even while you are driving. We’ve made a separate video for those of you on the fence about upgraded alternator charging and you can check it out here:

