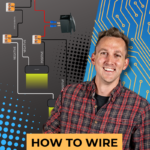
If you’re building out your camper van, installing lights is probably at the top of your to-do list—after all, proper lighting is essential for comfort and functionality. In this guide, we’ll walk you through the basics of wiring lights in your van as part of lesson 6.2 in our Branch Circuit Playlist.

Wiring Puck Lights VIDEO

Prerequisites: Basic Wiring Skills
Before we jump into the tutorial, there are a couple of things you should already know. If you’re not familiar with basic wiring techniques—like cutting wire, stripping wire, and crimping terminals—I recommend checking out the Wire Terminals playlist in our Academy that covers these skills. Once you have those basics under your belt, you’ll be ready to wire up USB and 12-volt outlets like a pro.
Tools & Equipment
For this demo, we’ll be using a Blue Sea Blade Fuse Block. There are several types of fuse blocks available, including models from Progressive Dynamics, Blue Sea Safety Hub, and Tiger Expedition UFO 200. While the specifics may vary, the connection method is essentially the same. You’ll also need a distribution hub—such as the Victron Lynx Distributor—to bring power from the battery, but we’re going to focus on the connections to the outlets for now.
Safety First
Before starting, always make sure your power is off. In this demo, we’ve already pulled the fuse from the fuse block to ensure there’s no power running through the wires while we work.
Step 1: Wiring the Switch
- Prepare the Fuse Block: Start by removing the fuse from the fuse block to ensure there’s no power in the circuit.
- Understand the Switch: A basic switch connects and disconnects two terminals depending on its position.
- Connect the Switch Wires:
- Attach a spade terminal to one end of the positive wire and connect it to the middle terminal of the switch.
- Attach another positive wire to the opposite terminal of the switch, which will lead to the light.
- Organize Negative Wires: Use a lever nut to secure the negative wire for flexibility in case you need to connect additional circuits later.
Step 2: Wiring the Light
- Identify the Light’s Polarity: Check the back of your light for positive and negative symbols. Be cautious—sometimes, colors may not align with standard DC wiring conventions (e.g., black for positive and white for negative).
- Connect the Wires:
- Use lever nuts to connect the light’s positive and negative wires to the corresponding wires from the switch.
- Double-Check Connections: Ensure all positives and negatives are correctly aligned.

Step 3: Testing the Circuit
- Replace the fuse in the fuse block.
- Flip the switch to ensure the light turns on. Success!
Adding Additional Lights
Want to wire multiple lights? It’s easy:
- Remove the fuse before working on the circuit.
- Use the lever nuts to connect the additional light’s positive and negative wires to the corresponding wires from the first light.
- Replace the fuse and test. Both lights should illuminate.

For spaced-apart lights:
- Add extension wires to reach the next light location.
- Repeat the same wiring process using lever nuts to connect positives to positives and negatives to negatives.
Key Tips for Multi-Light Setups
- Lever nuts with multiple ports (e.g., 5-port connectors) can simplify wiring for multiple lights.
- Ensure all positives and negatives for each light are grouped together.
Considerations for Switch Placement
A single switch is usually sufficient for small spaces like an 80-square-foot camper van. Multiple switches can complicate the wiring, so keep it simple if possible. However, if you need switches in multiple locations, stay tuned for the next tutorial, where we’ll tackle multi-way switching setups.
