Anderson connectors are a fantastic way to add modular branch circuits to your camper van or RV conversion. In this post, we’ll cover some essential tips and tricks for wiring them effectively so you can optimize your electrical setup.

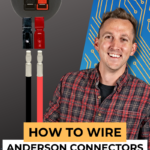
How to Use Anderson Connectors – VIDEO

Tools & Equipment
For this demo, we’ll be using a Blue Sea Blade Fuse Block. There are several types of fuse blocks available, including models from Progressive Dynamics, Blue Sea Safety Hub, and Tiger Expedition UFO 200. While the specifics may vary, the connection method is essentially the same. You’ll also need a distribution hub—such as the Victron Lynx Distributor—to bring power from the battery, but we’re going to focus on the connections to the outlets for now.
Safety First
Before starting, always make sure your power is off. In this demo, we’ve already pulled the fuse from the fuse block to ensure there’s no power running through the wires while we work.
Why Use Anderson Connectors?
Anderson connectors provide a quick and secure way to connect and disconnect various circuits in your van or RV. We used them in our EXPLORIST.Life Show Transit Van build, and they worked exceptionally well for a variety of applications, including:
- Lighting
- Water pumps
- Refrigerators
- Other 12V accessories
One of the key benefits of using Anderson connectors is that they allow for modularity and easy replacement of different circuits without rewiring the entire system.
Wiring Anderson Connectors for Constant and Switched Power
Now, let’s talk about how to wire Anderson connectors and why you might want to set up one for constant power and another for switched power.
Step 1: Mounting the Anderson Connector Wall Port
To make installation easy and seamless, we use an Anderson connector wall port, which comes with a trim ring for clean mounting into your van’s wall. This allows you to plug in any necessary circuits while keeping wiring hidden and organized.

Step 2: Wiring the Circuits

We run two separate circuits to the two different sets of ports on the Anderson connector:
- Constant Power Circuit: This circuit remains powered at all times. We wire it directly from the fuse block to the Anderson connector with no switch in between. This setup is ideal for devices like refrigerators, which need a continuous power supply.
- Switched Power Circuit: This circuit is wired through a toggle switch between the fuse block and the Anderson connector. This allows you to turn the power on and off as needed, making it perfect for lights, water pumps, or other accessories that don’t need to be powered 24/7.
Step 3: Connecting Devices
- A refrigerator or other always-on device can be plugged into the constant power Anderson connector.
- A water pump or lighting system can be plugged into the switched power Anderson connector, allowing you to control it with a switch.
Final Thoughts
Using Anderson connectors in your camper van or RV electrical system offers a flexible, modular, and efficient way to manage your branch circuits. Whether you need constant or switched power, this setup allows you to easily adapt your system to different needs.
